
I had a great response to CHA demo videos I was publishing earlier - thank you so much for your interest in my new products and techniques based on mixing and creating custom textures! Encouraged by that I decided to create simple home decor project based on my recipe of mixing Micro Beads into 3D Gloss Gel - to show you real, finished artwork, not just simple tag.
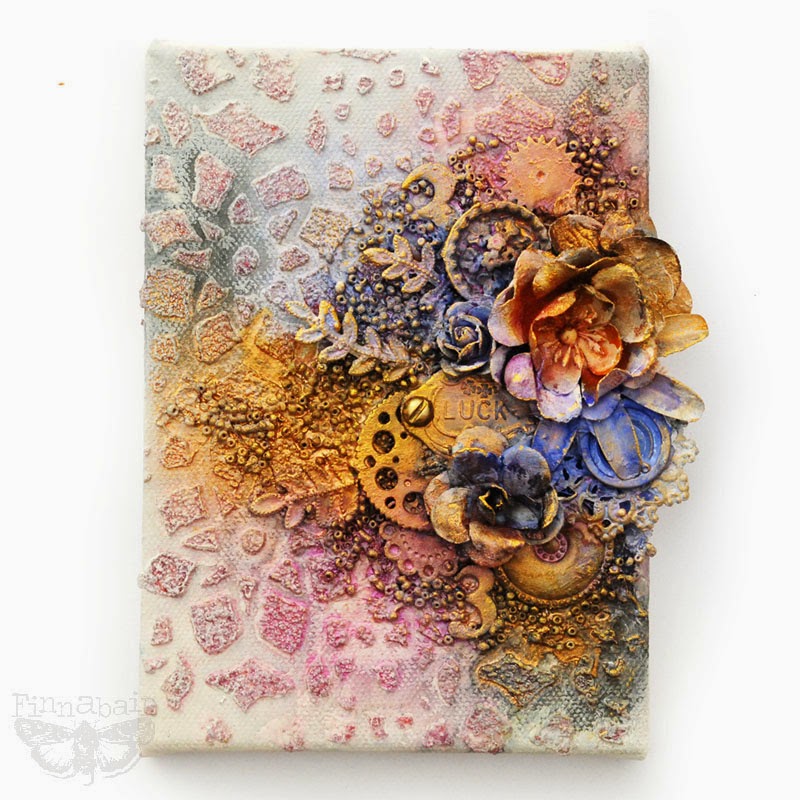
I was trying to create something rich, detailed but not too complex - and having more optimistic color palette than my usual blacks, blues and greens... it's good to have a challenge from time to time, right? So, here is the effect of my experiment, small mixed-media canvas with loads of texture and shine!

I love the mosaic effect you can get using lace stencil and dimensional texture gel. It adds so much interest to the background and catches the light beautifully... or adds lovely grain if you will cover it a bit with gesso, like i did!

You can use almost any kind of embellishment or found object for this kind of creation. Possibilities are endless as you are adding the colors of your choice in the very end of the process.

Those of you who are coming to Creative World Show in Frankfurt this weekend will have a chance to see my demos at Notions Marketing booth. I promise to have this piece with me - so you can see and touch all the details :) I hope to see you there!
Here is the full Art Recipe and some step-by-step info for you! :)

Here we go - short step-by-step for you!
1. I started with making my own texture gel based on Art Basics 3D Gloss Gel and Art Ingredients Micro Beads in selected colour. I decided to go for purple - and I simply mixed the beads into my 3D Gel. When the custom gel was ready I picked one of my favorite stencils and applied it on a small canvas using just a palette knife.

2. I dried the texture for a moment with heating tool to avoid "accidents" when decorating the project. After a minute or two 3D Gel created film on the top and it was quite safe to work on it. Now I used more of 3D Gloss Gel as an adhesive for all my metal and paper embellishments. I created a pretty complex cluster and dried it again with heating tool to make sure it will stay in place!

3. To add more texture I added more of Art Ingredients - Glass Beads (Licorice, Cobalt Blue) using 3D Gel as my glue again. I simply applied the gel in the desired places and sprinkled the beads on it. I dried everything again - and left it for a moment to "rest". After a couple of minutes I dabbed a bit of Art Basics - Heavy White Gesso on the top of my embellishments and beads.

4. When gesso was dry I added the colors. I put my Art Ingredients - Mica Powder into spray bottles and added water to create shimmering sprays in gold and pink. I did the same with Primary Elements Pigments in shades of purple and violet. When the sprays were ready I sprayed the projects focusing mostly on the embellishments. I added a touch of black for more depth (Lindy's Stamp Gang Spray) and when the project was dry I added some gold highlights with a bit of Silks Acrylic Glaze - Solar Gold. Little canvas was ready!

I hope you enjoyed this technique - it is great to apply it to many home decor and altered projects too and I'm sure you will come with many wonderful ideas!
Here is the list of products from put Mixed Media Place Shop for your convenience
(new Art Ingredients should be available in late February!)
 |  |  |  |  |  |
 |  |  |  |  |  |
 |  |  |  |  |  |
Sending lots of love - and see you in Frankfurt!


14 comments:
It's beautiful! I can't wait to get some of your new products - have pre-ordered some of the stamps, so far!
Looks really beautifull. I already preordered some of your new products.. Can't wait for them to arrive <3
Gorgeous as always!! I adore your work. Thanks for the inspiration : )
Beautiful canvas, love seeing all the color, and mica powders in action. Thank you so much for the short picture tutorial, things like that really help. Have a great time on your trip. Wish I could be there.
Thank you for sharing this recipe. The canvas is beautiful and different. ; )
I loveeeeeeeeeeeeed! Thanks for share!!!
Fantastic recipe yet again, thank you!!
As always, your art is perfect! Your canvas has lovely colors, embellies and the layout is wonderful. Thanks for sharing the recipe.
awesome canvas, I love it!
love this, wow!
Beautiful creation and great tutorial! You made the process look simple with such a beautiful outcome. Thank you for sharing your techniques.
Wow the colours are so rich and the texture looks fab, a very stunning canvas xx
Love d colours and d metals the way you've layered them.
Absolutely stunning. So inspired by your work especialy the colour combination.
Post a Comment