
Hello my Friends!

Art Alchemy Waxes.


We are right in the middle of 2017 and what a half of the year it has been for me...
This time has been filled with classes (including my very first 'Imagine' online class with Everything Art!), LOTS of traveling and teaching in all the corners of the world, inspiring meetings and new experiences... Im sure some of you could see me in person, some may follow my Instagram and FB - so you could see how busy it really was! Every ay I will repeat - I'm blessed with the chance to do what I love, the most rewarding job I could ask for - encouraging people to be creative and to spread their wings... Thank you so much for making it possible!
And also: brand new Finnabair products that saw the light of day. :)
I'm so proud to be seeing so many of you enthusiastic about my Art Alchemy Waxes, new lines of Acrylic Paints (including Sparks and brand new Impasto Paints), new Mechanicals, Art Stones, Patina and Stone Effect Pastes and also my own special Apron & Sleeves! :)
Today I'd like to leave you with my superbly talented Brand Ambassadors who kindly agreed to meet again and talk about their personal favorites among my products and present some of their gorgeous artworks to inspire us all!
Their creativity knows no limits....Art Alchemy Waxes.
Though at first I wasn't convinced, they slowly became my favorite
of the year: the Waxes!
I'm not much of a bling girl and considering all the wax colors contain shine to them, I had to tame them, learn to know them and most of all, discover ways to make them work within my universe.
I'm not much of a bling girl and considering all the wax colors contain shine to them, I had to tame them, learn to know them and most of all, discover ways to make them work within my universe.
But
once I got there, the result just made me swoon. And as they do
smell so nicely, you just want to leave them on your table! ;)
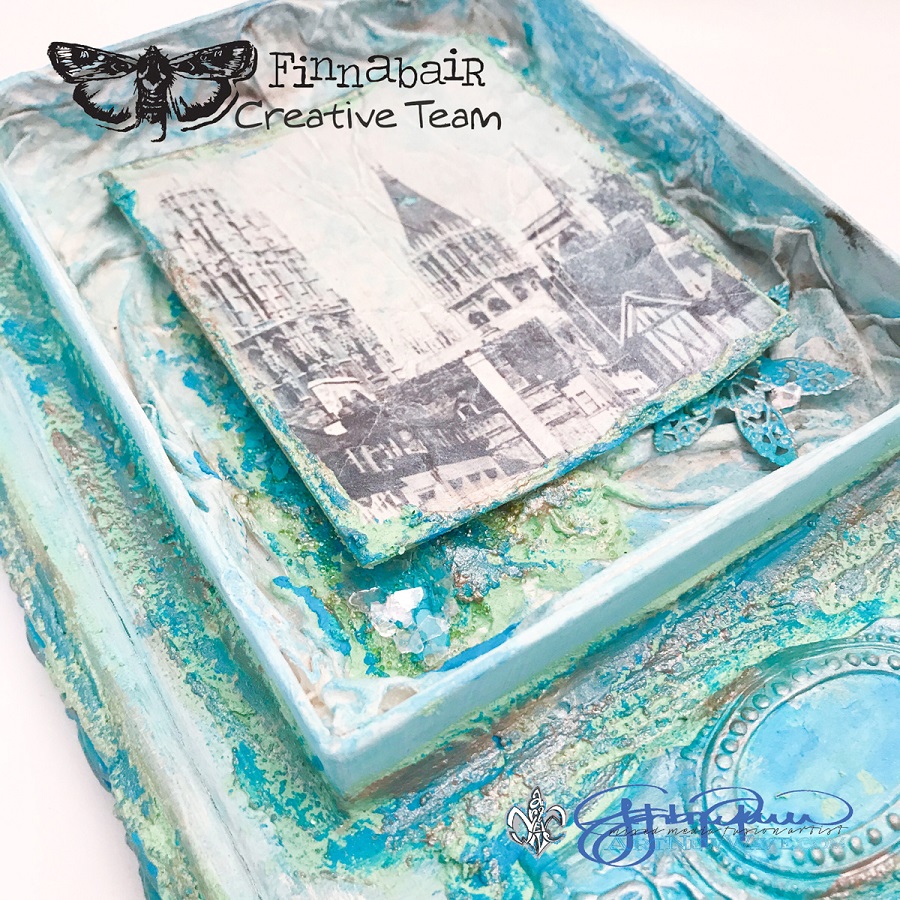
This project is one of my Journal on Monday videos, it's called 'So emotional'. Unfortunately... I completely forgot to turn the camera back on when working with the wax... Like I said, they make me swoon! So you can see the whole page come together, except for the wax part, right here. :)
This project is one of my Journal on Monday videos, it's called 'So emotional'. Unfortunately... I completely forgot to turn the camera back on when working with the wax... Like I said, they make me swoon! So you can see the whole page come together, except for the wax part, right here. :)


I LOVE color and contrast.
I work a lot in muted colors; lots of browns and blues. But highly intense color outlined in black always grabs my eye.
You cannot dilute down the color in these great paints with water. The color remains intense.
But the thickness is great for complete coverage on almost any project. I used a bit of water here to make them glide on easier into tiny spaces, but as you can see, the color is still great. And the black used to outline or edge the colors really makes the colors pop.
Read more about my Paintbrush Doll on my blog.

Today I would love to share with you my creative love of using one of my favourite new release products: Art Alchemy Metallique paints.
For the project pictured below I have used the new release ‘Dark Forest’ green.
What is to love about the Metallique paints?
 Above is a picture collage of a quick little project I created just for fun and shared on my Instagram account. It shows a small air-dry clay pot, that I coated in Metallique paint. When it was dry I potted it up with some small cactus pups. [The cactus will survive for about 6 months before I have to re-pot them, and for now to water them, I just use a pipette].


Well, for me it is the fast drying and waterproof properties I get when using them to finish my air-dry clay projects. Because I don’t have access to glazes and a kiln I use the Art Alchemy Metallique products because I can emulate and/or reproduce the finish and look of a glaze, with the added bonus of being water repellent.


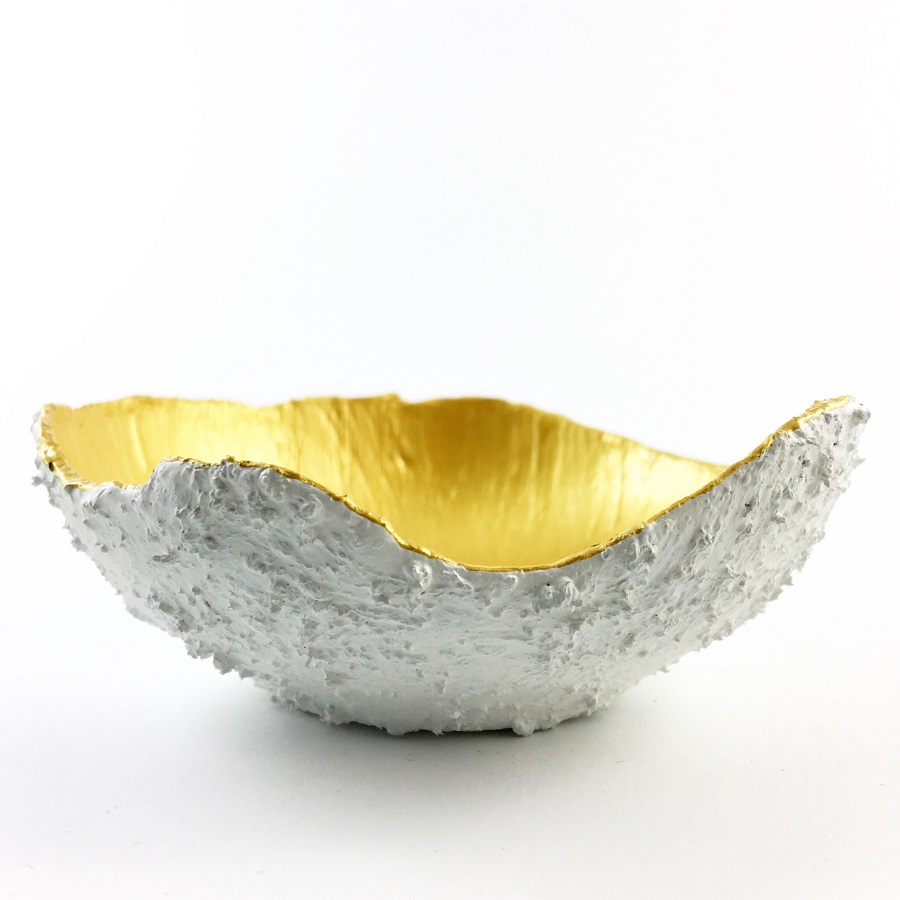
These next two photos show 2 air-dry clay bowls that I created and finished with 2 of the fabulous first release Art Alchemy Metallique paints.
The first bowl I have used the Metallique paint on both the inside and outside of the bowl.
With the crackled finished it was used to highlight the cracks. It is important when creating this effect to work fast, and to use a moistened cloth [I used a baby wipe], to buff off [remove] the Metallique paint as it has a ‘fast drying’ quality.

With the second bowl I used the Metallique paint on the inside surface.
When I use the paint as a colour or finish coat I like to ensure that the clay surface is first under coated with Art Basics Heavy Gesso. The outside surface effect of this bowl was achieved by using Stone Effect Paste and Heavy Gesso.
So... what is not to love about Art Alchemy Metallique Paints?!!! :)
The products that totally stole my heart in 2017 are the Art Alchemy Waxes.
They work perfectly on both light and dark surfaces making every kind of project look spectacular highlighting chosen details.
They are really subtle and very easy to apply + they smell delicious... :)
I usually like to apply the Waxes with my fingertips - this allows me a better control of where they go; I use a little paintbrush for the spots that are harder to rich.
I usually like to apply the Waxes with my fingertips - this allows me a better control of where they go; I use a little paintbrush for the spots that are harder to rich.
My personal number one is Metallique Wax in White Gold! :)


Art Alchemy Sparks Paints.
I've used these paints in numerous projects of mine: Heart of Gold, this Sparks card, the Carpe Diem journal cover and many more - they are simply always on my desk. :)

 P.S If you're anywhere near Helsinki, there's a great opportunity to meet Riikka in person during one of her live classes in August!
Aren't they ALL amazing?
I'm glad that I don't have to pick my favourite products from my latest releases as I truly love them all, and watching my Creative Team, Ambassadors and you all creating with them makes my heart flutter and sing! I keep checking Instagram for new, inspiring projects on the daily basis - so if you'd like to show me projects you are proud of - don't forget to tag me! It will be much easier for me to find you and your beautiful art!


Art Alchemy Sparks Paints.
So hard to pick one product as my favorite! I mean they all are awesome - new colors to the wonderful Art Alchemy paints, the new Impasto paints, bigger jars of Rust and Patina sets... But I really, really like Sparks! The magpie in me goes crazy when I see their shine and shimmer!
My tip to using them would be to mix in some matte in the same project to really show off the shine. What I usually do, though, is mix the Sparks with Art Alchemy paints so it's shine all the way!
I've used these paints in numerous projects of mine: Heart of Gold, this Sparks card, the Carpe Diem journal cover and many more - they are simply always on my desk. :)


Aren't they ALL amazing?
I'm glad that I don't have to pick my favourite products from my latest releases as I truly love them all, and watching my Creative Team, Ambassadors and you all creating with them makes my heart flutter and sing! I keep checking Instagram for new, inspiring projects on the daily basis - so if you'd like to show me projects you are proud of - don't forget to tag me! It will be much easier for me to find you and your beautiful art!


